Upgrading your computer with a PCIe SSD adapter card can significantly enhance its performance. This process may seem daunting for first-timers, but following clearly defined steps will guarantee a smooth installation experience.
What You Will Need
- PCIe SSD adapter card
- PCIe SSD
- Computer case with available PCIe slot
- Phillips head screwdriver
- Anti-static wristband (optional, but recommended)
Step-by-Step Installation Guide
Step 1: Prepare Your Workspace
Before starting, ensure your workspace is clean and static-free to avoid damaging any components. An anti-static wristband can help prevent static electricity from harming your PC.
Step 2: Power Down and Unplug Your Computer
Shut down your computer properly and unplug all cables, including the power cable. This step ensures that you won’t damage any components or get an electric shock.
Step 3: Open Your Computer Case
Use a Phillips head screwdriver to remove the screws holding the case cover and carefully set the cover aside. This will expose the internal components of your computer.
Step 4: Locate an Available PCIe Slot
Find an available PCIe slot on your motherboard. PCIe slots are usually found in parallel alignment and come in different lengths (x1, x4, x8, x16). Ensure the slot you select matches the length of your PCIe SSD adapter card for optimal performance.
PCIe Slot Types and Dimensions
| Slot Type | Dimensions | Common Uses |
|---|---|---|
| PCIe x1 | 25 mm | Audio, Network Cards |
| PCIe x4 | 39 mm | SSD, RAID Cards |
| PCIe x8 | 56 mm | SSD, Storage Solutions |
| PCIe x16 | 89 mm | GPU, High-Performance SSD |
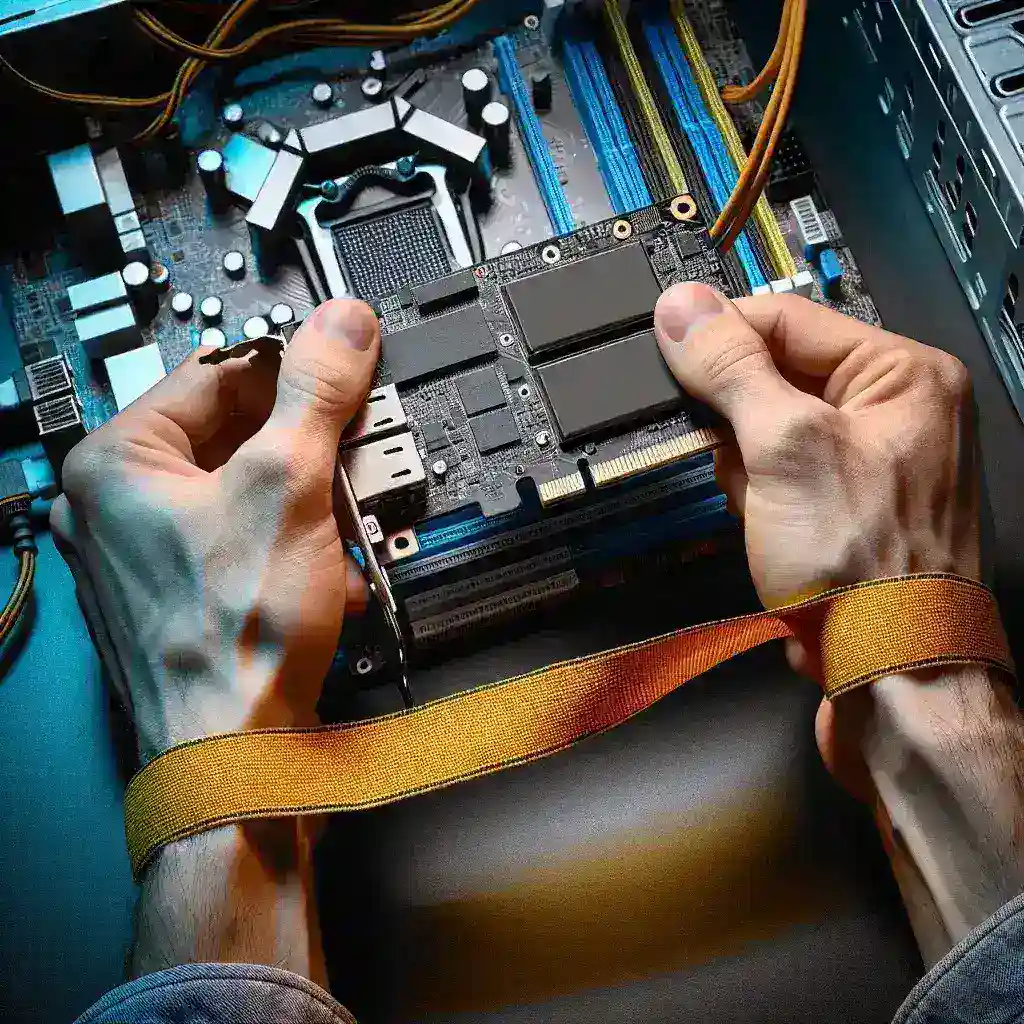
Step 5: Install the PCIe SSD onto the Adapter Card
Follow the manufacturer’s instructions to mount your PCIe SSD onto the adapter card. Usually, this involves screwing the SSD into place on the adapter using the provided screws.
Step 6: Insert the Adapter Card into the PCIe Slot
Gently align the PCIe SSD adapter card with the PCIe slot and firmly push it in until it’s securely seated. A click sound typically confirms that the card is in place.
Step 7: Secure the Adapter Card
Use the screwdriver to fasten the screws on the expansion slot cover, securing the adapter card in place. This prevents the card from coming loose during operation.
Step 8: Close the Case and Reconnect Cables
Carefully reattach the computer case cover and screw it back into place. Reconnect all cables, including the power cable, to your computer.
Step 9: Power On and Install Drivers
Power on your computer. It should automatically detect the new hardware. Follow the manufacturer’s instructions to install any necessary drivers for the PCIe SSD adapter card. These drivers might be available on a CD provided with the card or downloadable from the manufacturer’s website.
Troubleshooting Tips
Computer Doesn’t Recognize the SSD
- Ensure the SSD is correctly mounted on the adapter card.
- Verify the adapter card is securely seated in the PCIe slot.
- Check your BIOS/UEFI settings to ensure the PCIe slot is enabled.
Experiencing Slow Performance
- Ensure you are using the correct type of PCIe slot (x4 or x16 for optimum performance).
- Update the SSD and adapter card drivers.
- Check if thermal throttling is causing the performance drop and consider installing additional cooling solutions.
System Crashes or Freezes
- Re-seat the adapter card to ensure it’s properly connected.
- Check for driver conflicts and update all system drivers.
- Test the SSD on another computer to rule out hardware failure.
Conclusion
Installing a PCIe SSD adapter card can greatly improve your computer’s performance. By following this guide, you should have a smooth installation process and resolve any complications that may arise. This upgrade will provide faster data transfer rates, quicker boot times, and overall better system responsiveness.